
An Overlooked BERNINA Feature You Should Use
Jun 30, 2026Most sewists adjust Stitch Width the same way every time—by turning the upper Multi‑Function Knob on the outside of the machine. It’s fast, it’s familiar, and you can do it while sewing. But most BERNINA machines actually give you two ways to adjust Stitch Width, and the second method offers more precision and more control.
Today, I’m sharing the Stitch Width lesson from inside my B 990 Sewing Mode Essentials class to show you how both methods work.
The Stitch Width Function
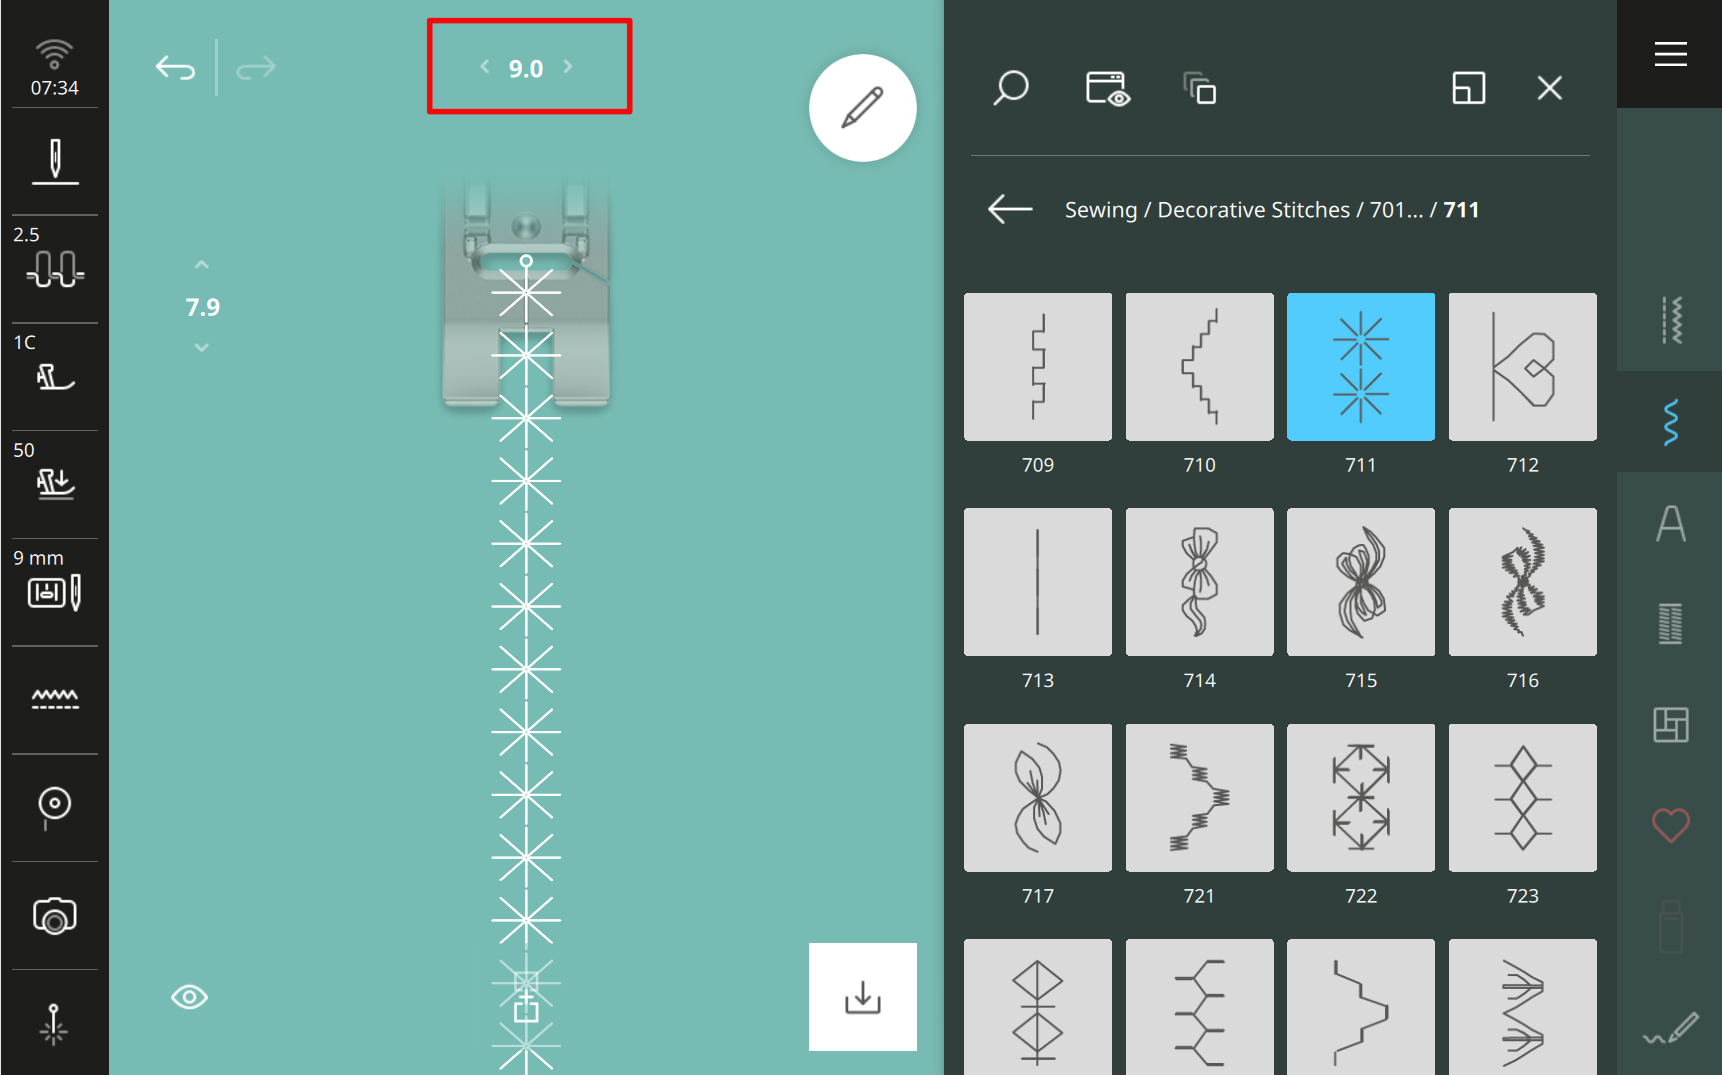
When selecting a stitch pattern, the recommended stitch width is indicated on the touch screen.
Stitch Width can be modified for:
-
Most decorative stitch patterns
-
Alphabets
-
Buttonholes
However, there are a few exceptions.
When Stitch Width Cannot Be Modified
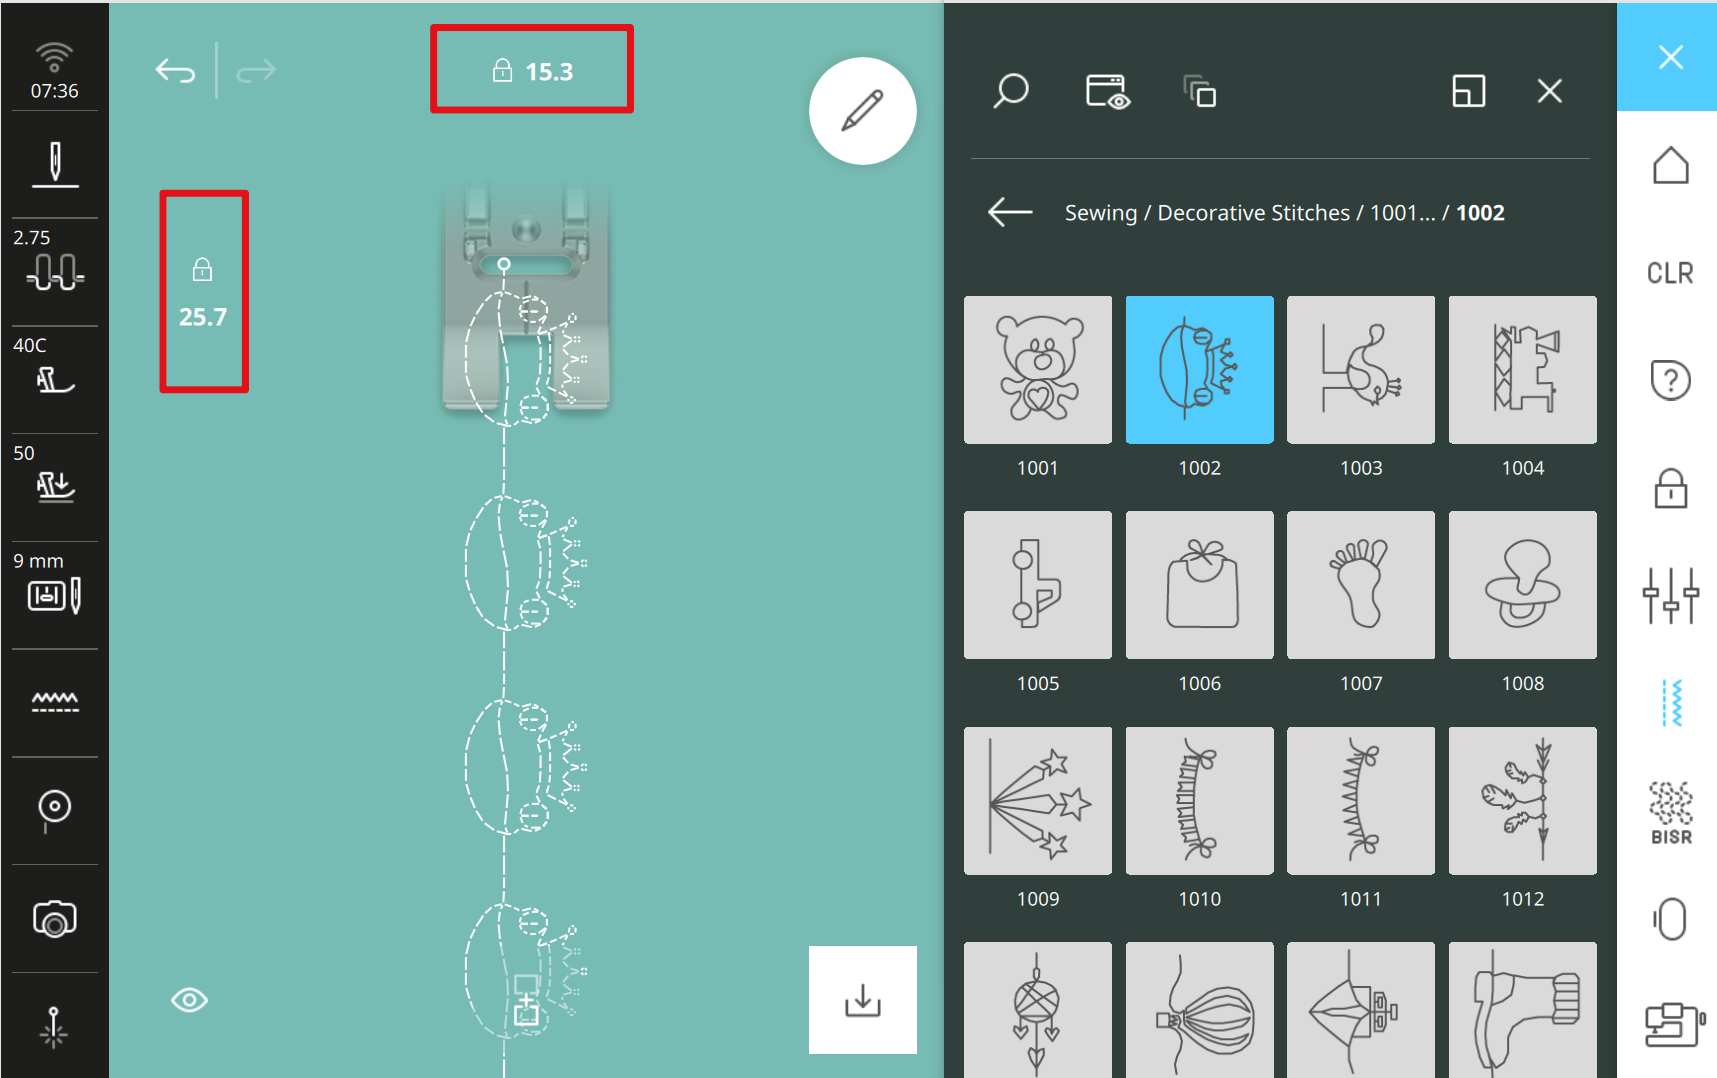
Some Sideways Motion stitches—such as stitch pattern #1002 on the B 990—have a padlock icon displayed in both the Stitch Width and Stitch Length fields.
-
The stitch width and length are locked
-
Neither setting can be changed
These stitches are designed with fixed dimensions to ensure proper sideways movement and stitch formation.
Other than these exceptions, you can freely modify Stitch Width for nearly all stitch patterns, alphabets, and buttonholes.
Two Ways to Adjust Stitch Width
1. Turn the Upper Multi‑Function Knob
This is the method most sewists use. Just turn the top Multi‑Function Knob to increase or decrease the width. You can do this while sewing, which makes it ideal for quick adjustments.
2. Tap the Stitch Width Field in the Stitch Preview Area
When you tap the Stitch Width field, the Stitch Width dialog box opens.
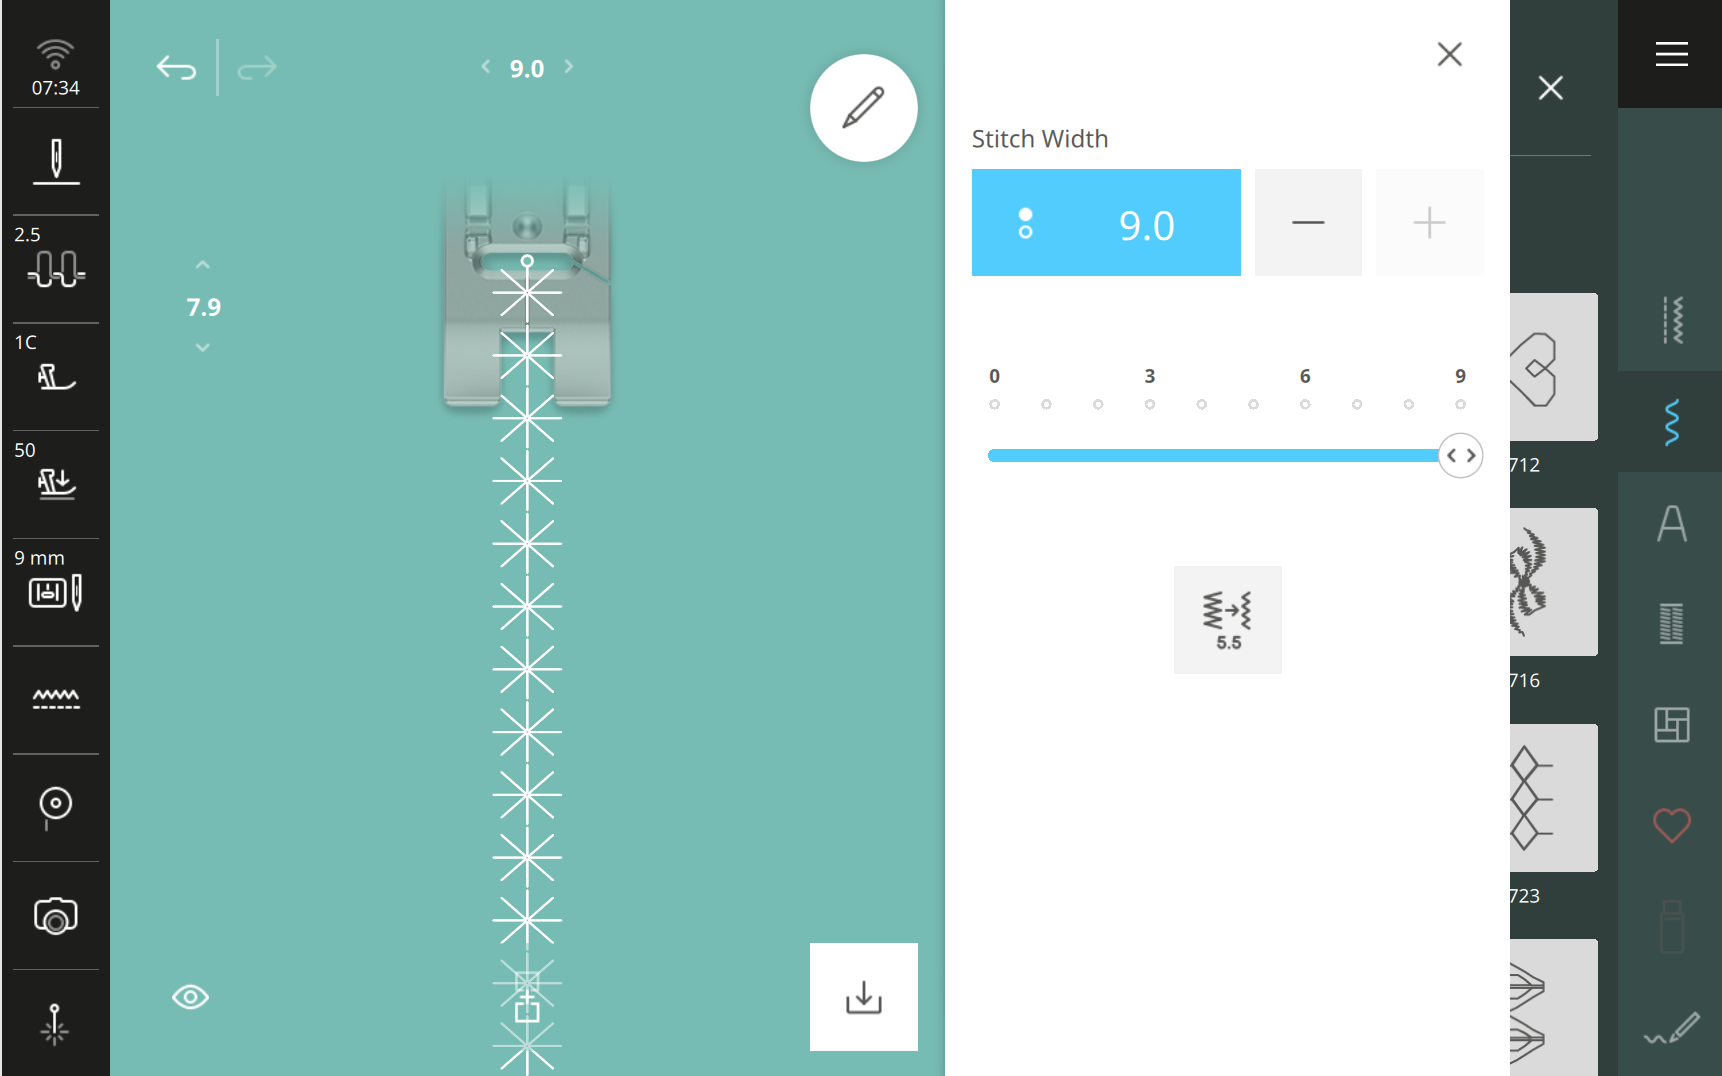
Inside this dialog box, there are two ways you can adjust the width .1 mm at a time:
-
Tap the + / – icons
-
Move the slider bar
When the Stitch Width is adjusted, the number changes in both the display box and in the Stitch Preview Area. They will also turn yellow, indicating the width has changed. This color change is your visual cue that you’re no longer using the default Stitch Width.
Quickly Set Stitch Width to 5.5 mm
Another function in the Stitch Width display box is that you can quickly set the stitch width directly to 5.5 mm.
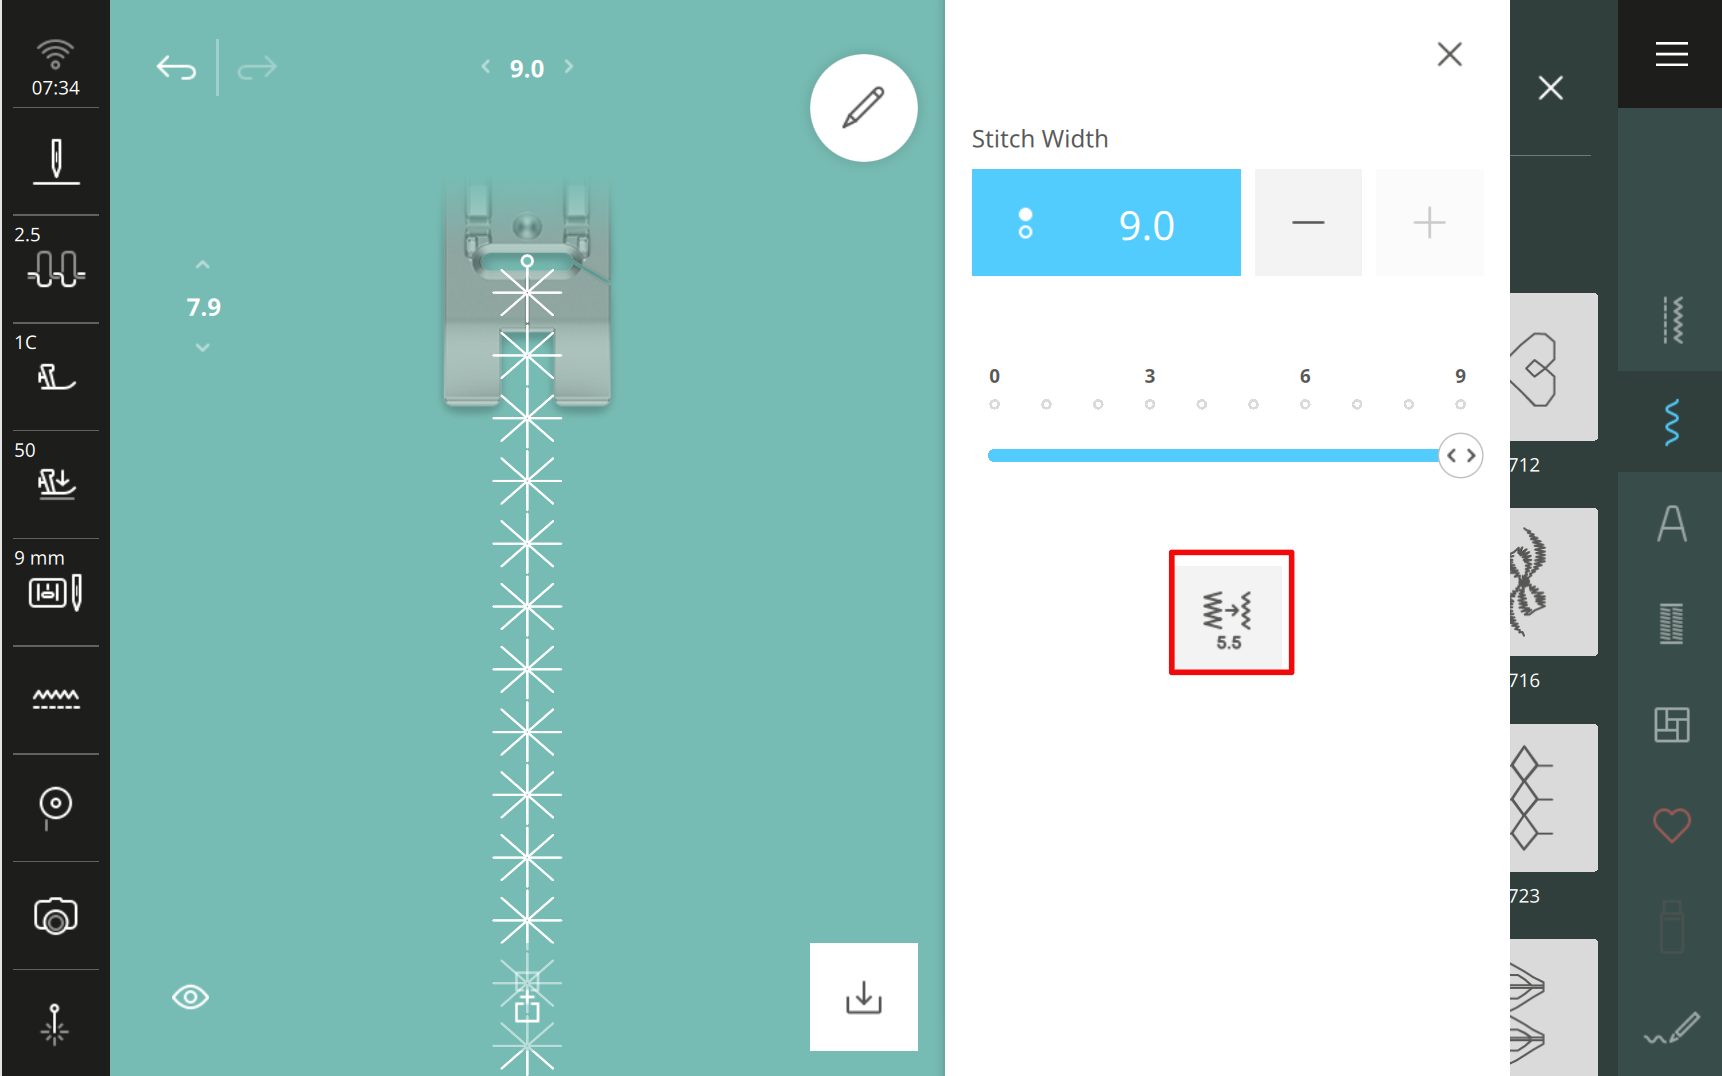
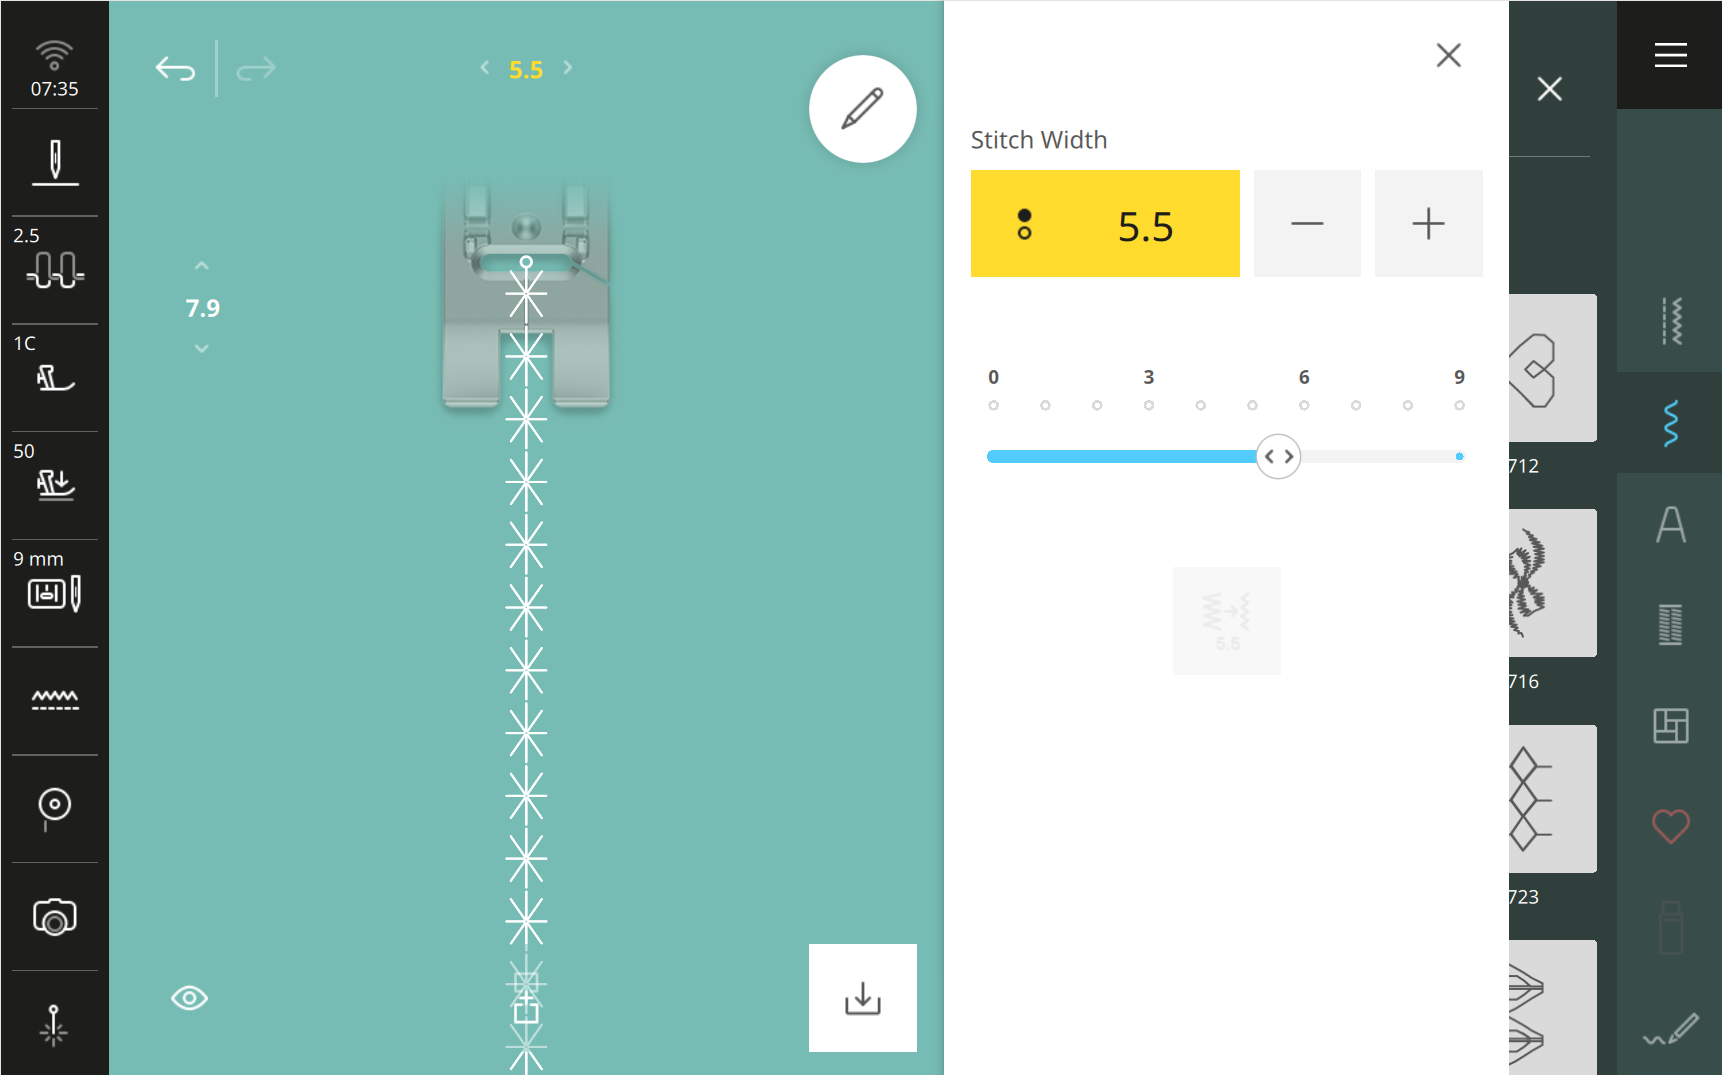
When selected the Stitch Width changes to 5.5 mm. A common reason to use this feature is when switching to a 5.5 mm presser foot—you can match the stitch width to the foot with one tap.
Why This Matters
Most sewists rely on the Multi‑Function Knob because it’s quick. But the Stitch Width dialog box gives you:
-
More precision
-
More control
-
Fast access to 5.5 mm Stitch Width
-
A clear visual indicator when you’ve changed the width
It’s a powerful tool hiding in plain sight—and once you start using it, you’ll wonder how you ever worked without it.
Discover Stitch Maker Classes and explore our hands-on Stitch Exercises—your path to mastering BERNINA techniques with creativity and confidence
Join Stitch Maker's Email List
Stay in the loop with all things Stitch Maker!
Get notified whenever a new learning tool launches so you never miss an opportunity to grow your skills.
