
Stitch Recipe Prep: Building a Stable Foundation
Sep 09, 2025
Before we dive into the fun of decorative stitching, let’s talk about the real MVP of your Stitch Recipe: the foundation fabric. It’s more than just a backdrop—it’s the base that supports every stitch, swirl, and flourish you create. And prepping it properly? That’s the secret to stitch success.
What Is Foundation Fabric?
Your foundation fabric is the material you’ll sew your Stitch Recipes onto. It’s the canvas for your creativity, and depending on its weight, it may need a little extra support to prevent tunneling or rippling as you stitch.
Step 1: Add Stabilization
To give your foundation fabric the body it needs (without turning it stiff or crunchy), start by fusing interfacing to the wrong side of the fabric. My go-to? OESD Fusible Woven. It adds just the right amount of structure while keeping the fabric soft and stitchable.
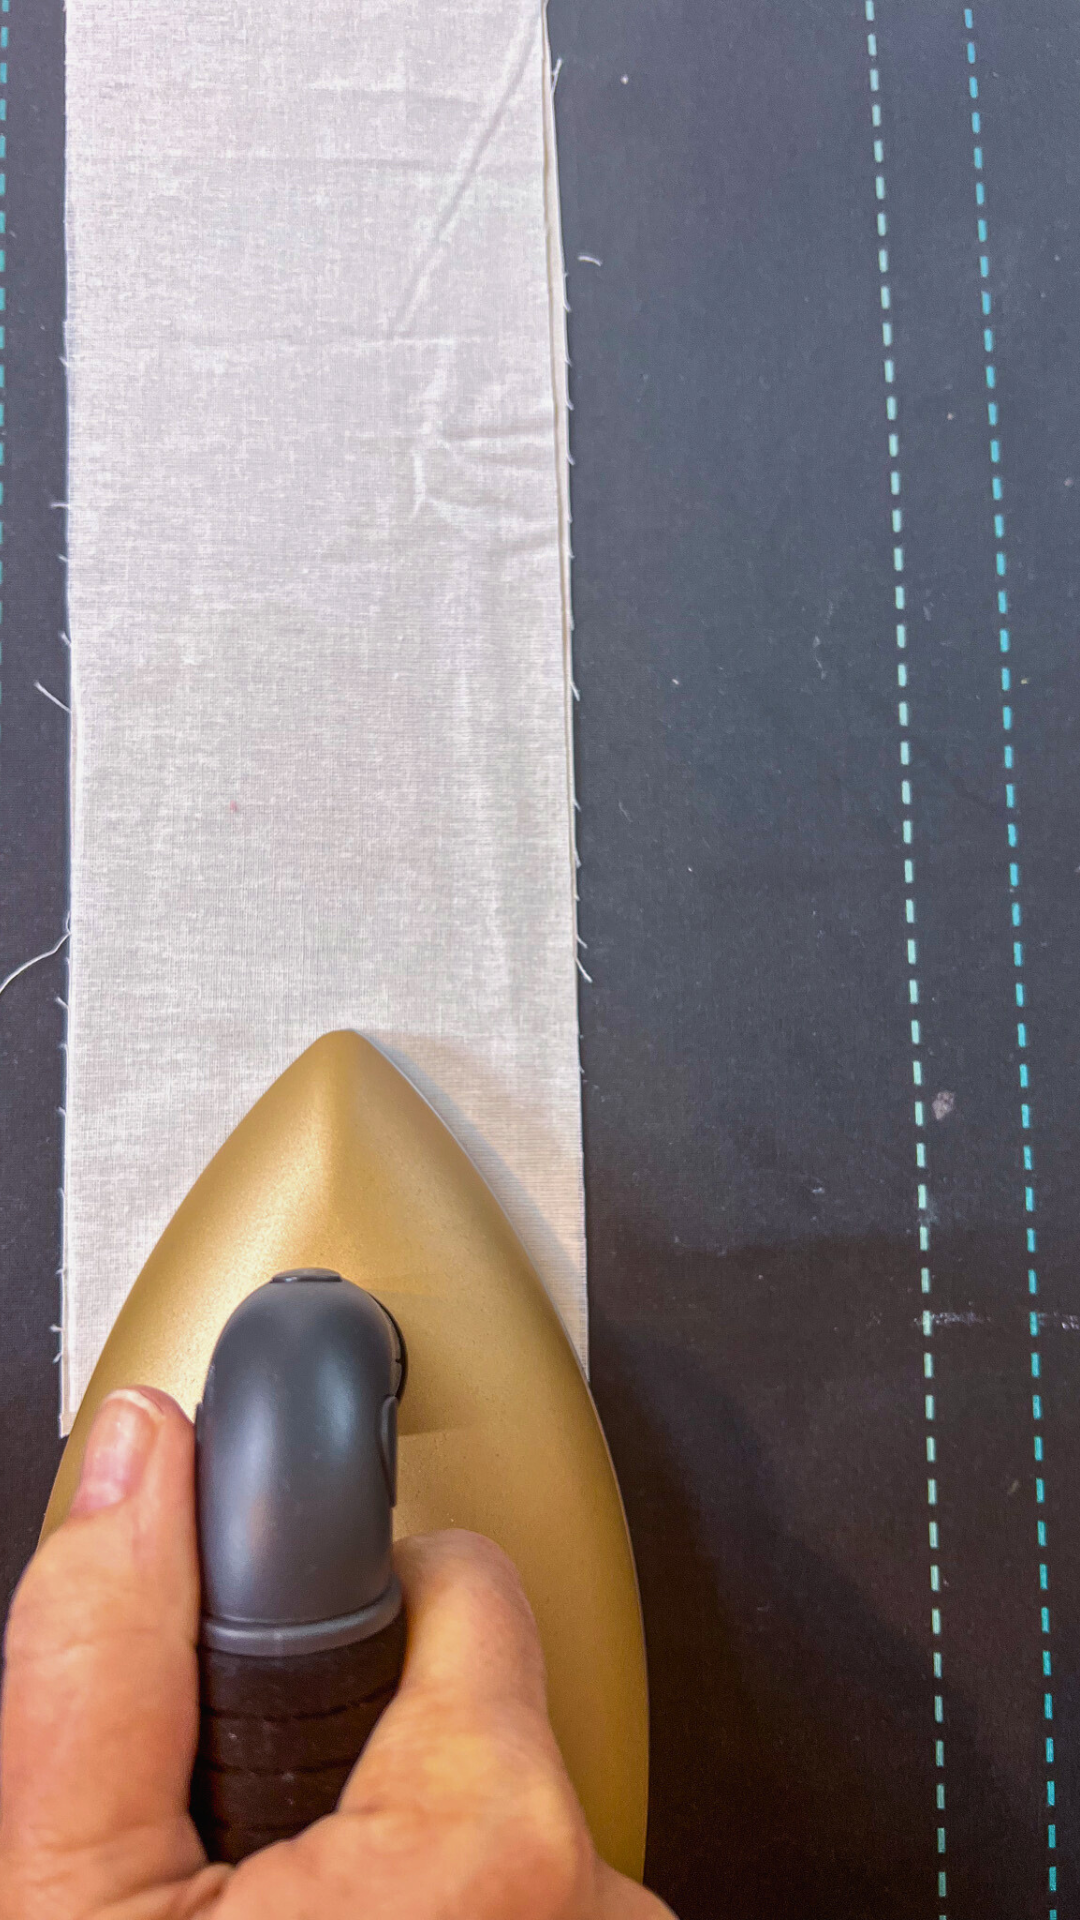
Tip: Always follow the interfacing instructions and test on a scrap first—your iron and your fabric will thank you.
Step 2: Choose a Foundation Fabric
While prints are pretty, they can compete with your stitch artistry. I prefer solid or tone-on-tone fabrics for foundation work—they let your Stitch Recipes take center stage. Think of it as giving your stitches the spotlight they deserve.
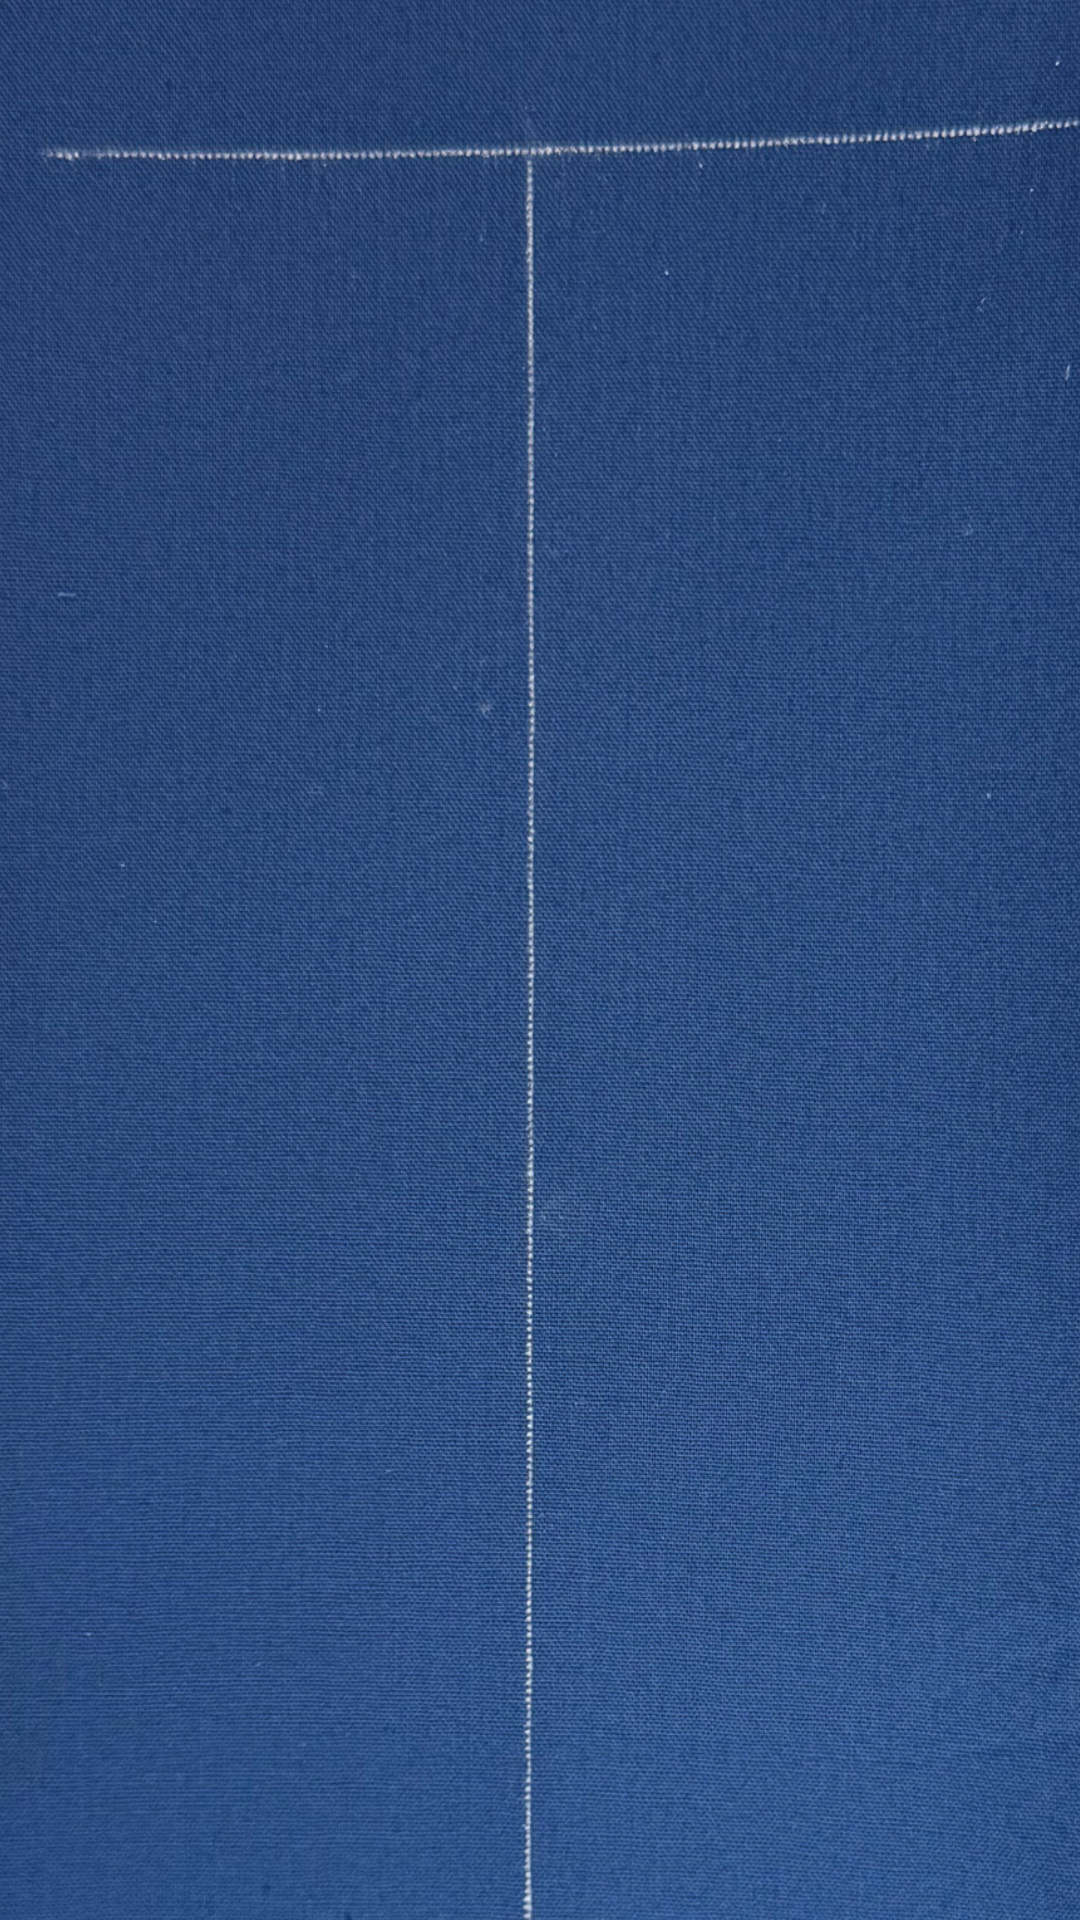
Step 3: Mark Your Stitch Guidelines
Once your interfacing is fused, it’s time to mark your Stitch Guidelines. These lines are your roadmap for straight, evenly spaced rows—and trust me, they’re essential.
- Use a fabric marker or chalk pencil.
- Test first! Make sure your marks can be removed from your chosen fabric.
- At minimum, mark two guidelines:
- A horizontal line to indicate where each Stitch Pattern Row begins.
- A vertical line to guide Stitch Pattern Row 1—typically the center row of your recipe.
Stitch Guidelines = Straight rows + stress-free stitching.
Final Prep: Stabilize Your Strip
With your guidelines marked, place a strip of stabilizer on the back side of the fabric. This adds extra support right where the stitching happens—especially helpful for dense or wide stitch patterns.
Now you’re ready to begin sewing your Stitch Recipe with confidence, clarity, and creative flair!
Want to learn more about creating Stitch Recipes? Take our class Stitch Recipes: From Creation to Completion for all the information you need to successfully create and sew Stitch Recipes. Learn More >
Keep Making Stitches!
Discover Stitch Maker Classes and explore our hands-on Stitch Exercises—your path to mastering BERNINA techniques with creativity and confidence
Join Stitch Maker's Email List
Stay in the loop with all things Stitch Maker!
Get notified whenever a new learning tool launches so you never miss an opportunity to grow your skills.
